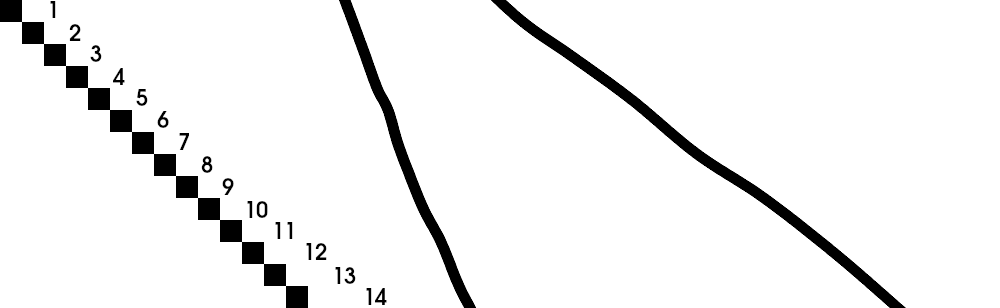
博文

目前显示的是 十月, 2023的博文

Linux 编译, 加载, 卸载驱动demo

markdown 从github下载驱动 ``` git clone git@github.com:bsdb0y/linux-kernel-hello-world-driver.git ``` 直接编译 ``` make ``` 然后加载驱动, 驱动以ko结尾 ``` sudo insmod hello.ko [ 7188.189653] HELLO LOADED ``` 然后卸载驱动 ``` sudo rmmod hello [ 7201.989317] HELLO UNLOADED ```

重新生成SSL证书之后的问题

markdown ## 问题 最近SSL证书到期了, 正常情况下可以用以下命令续租: ``` sudo /etc/init.d/apache2 stop certbot renew sudo /etc/init.d/apache2 start ``` 但是我的Blog从服务器中摘除了, 所以要生成新的证书: ``` sudo /etc/init.d/apache2 stop sudo certbot certonly --standalone -d xxx.xxx.xxx... sudo /etc/init.d/apache2 start ``` 成功, 但是SSL还是显示失效 ## 解决方法 用一个没有DNS代理的二级域名, 上去看看, 发现SSL证书没有用最新的 ![](https://raw.githubusercontent.com/Baileyus/blog_img/main/2023-10-23_19-07_1.png) ![](https://raw.githubusercontent.com/Baileyus/blog_img/main/2023-10-23_19-09.png) 登录服务器, 查看证书目录, 果然多了一个 ``` ll /etc/letsencrypt/live/ drwx------ 5 root root 4096 Oct 23 10:41 ./ drwxr-xr-x 9 root root 4096 Oct 23 01:51 ../ -rw-r--r-- 1 root root 740 Feb 24 2022 README drwxr-xr-x 2 root root 4096 Oct 23 10:51 xxx.xxx-0001/ drwxr-xr-x 2 root root 4096 Jul 24 03:17 xxx.xxx/ ll /etc/letsencrypt/archive/ drwx------ 4 root root 4096 Oct 23 10:40 ./ drwxr-xr-x 9 root root 4096 Oct 23 01:51 ../ drwxr-xr-x 2 root root 4096 Oct 23 01:51 xxx.xxx-0001/...

把 Namesilo 域名转到 CloudFlare

markdown 之前在 Namesilo 里用了好几年, 但是前阵子变得很贵, 而且之前过期没提醒, 导致过期, 收了我500人民币, 很难受, 所以想把他转到 CloudFlare 里, 刚续费的时候因为有账单没结清, 所以要等一阵子 在 Namesilo 里先把域名解锁, 获取授权码 ![](https://raw.githubusercontent.com/Baileyus/blog_img/main/namesilo-to-godaddy-1.jpg) 在 CloudFlare 里申请转入 ![](https://raw.githubusercontent.com/Baileyus/blog_img/main/2023-10-19_19-27.png) 然后就可以了, 可能会收到 Namesilo 的确认, 不管他就可以

推算墨盒喷墨地址表格

markdown # 推算 测试原图: ![](https://raw.githubusercontent.com/Baileyus/blog_img/main/308_carrtridge_test.png) 原地址表格打印在纸上的测试图: ![](https://raw.githubusercontent.com/Baileyus/blog_img/main/20231010120927.jpg) 由图可见, 顺序已经乱了, 规律如下: 首先我们把地址表格 P列 列出来 | Line | P | | --- | --- | | 1 | 1 | | 2 | 2 | | 3 | 3 | | 4 | 4 | | 5 | 5 | | 6 | 6 | | 7 | 7 | | 8 | 8 | | 9 | 9 | | 10 | 10 | | 11 | 11 | | 12 | 12 | | 13 | 13 | | 14 | 14 | 第一行显示了 数字6, 表示第1行的内容是由 P6 决定的 同理, 第二行显示了 数字4, 表示第2行的内容是由 P4 决定的 ... 所以, 我们把 P6, P4, ... 按顺序重新排列, 如下: | Line | P | | --- | --- | | 1 | 6 | | 2 | 4 | | 3 | 2 | | 4 | 14 | | 5 | 12 | | 6 | 10 | | 7 | 8 | | 8 | 9 | | 9 | 11 | | 10 | 13 | | 11 | 1 | | 12 | 3 | | 13 | 5 | | 14 | 7 | 正好是图案的顺序, 排列之后重新做表, 打印的图案如下: ![](https://raw.githubusercontent.com/Baileyus/blog_img/main/20231010121000.jpg) --- ## 
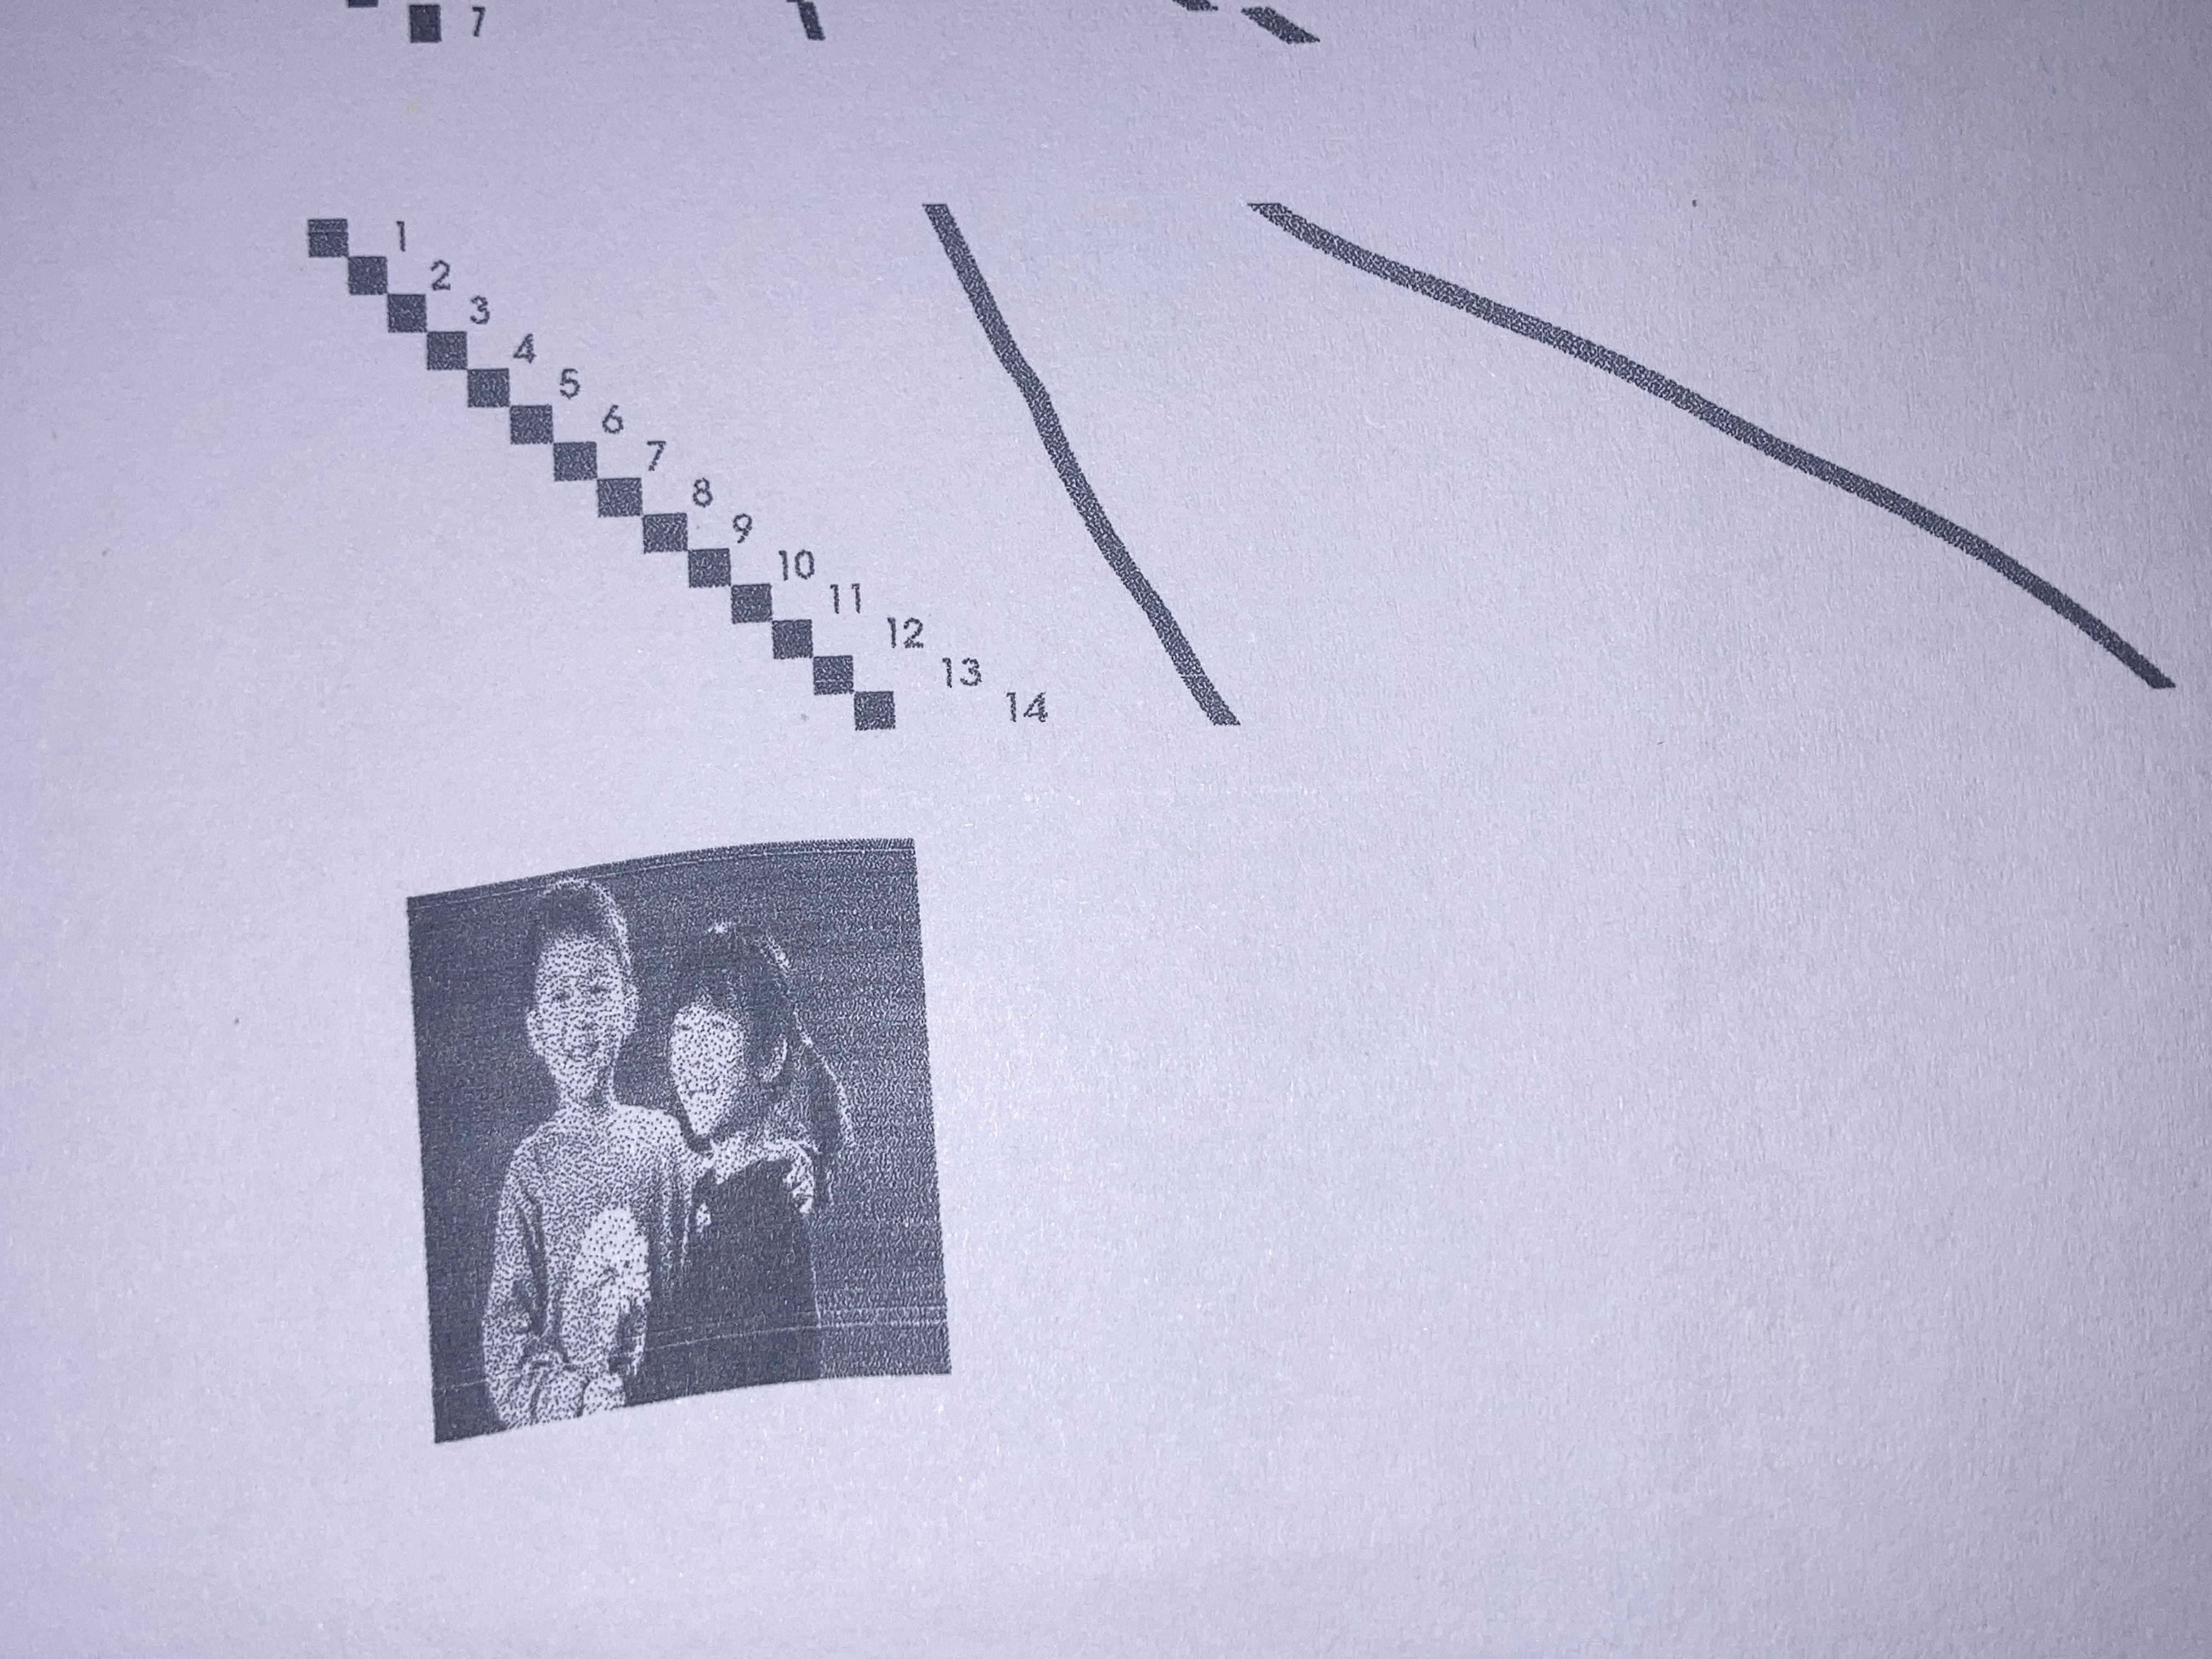
结论 用原表格生成的数据打印一次, 再按照打印后的乱序图片按顺序改P, 然后就可以生成新的表格 --- ## 错误推算 之前通过原手册的地址表格打印的图片按序号排好, 如下: | Line | P | | --- | --- | | 1 | 6 | | 2 | 4 | | 3 | 2 | | 4 | 14 | | 5 | 12...